Getting started with iWeb FTP
Sign up
If you haven't already, you should sign up for iWeb FTP. Our free trial accounts have access to all of the features of our paid packages - so you'll be able to try out everything in this guide.
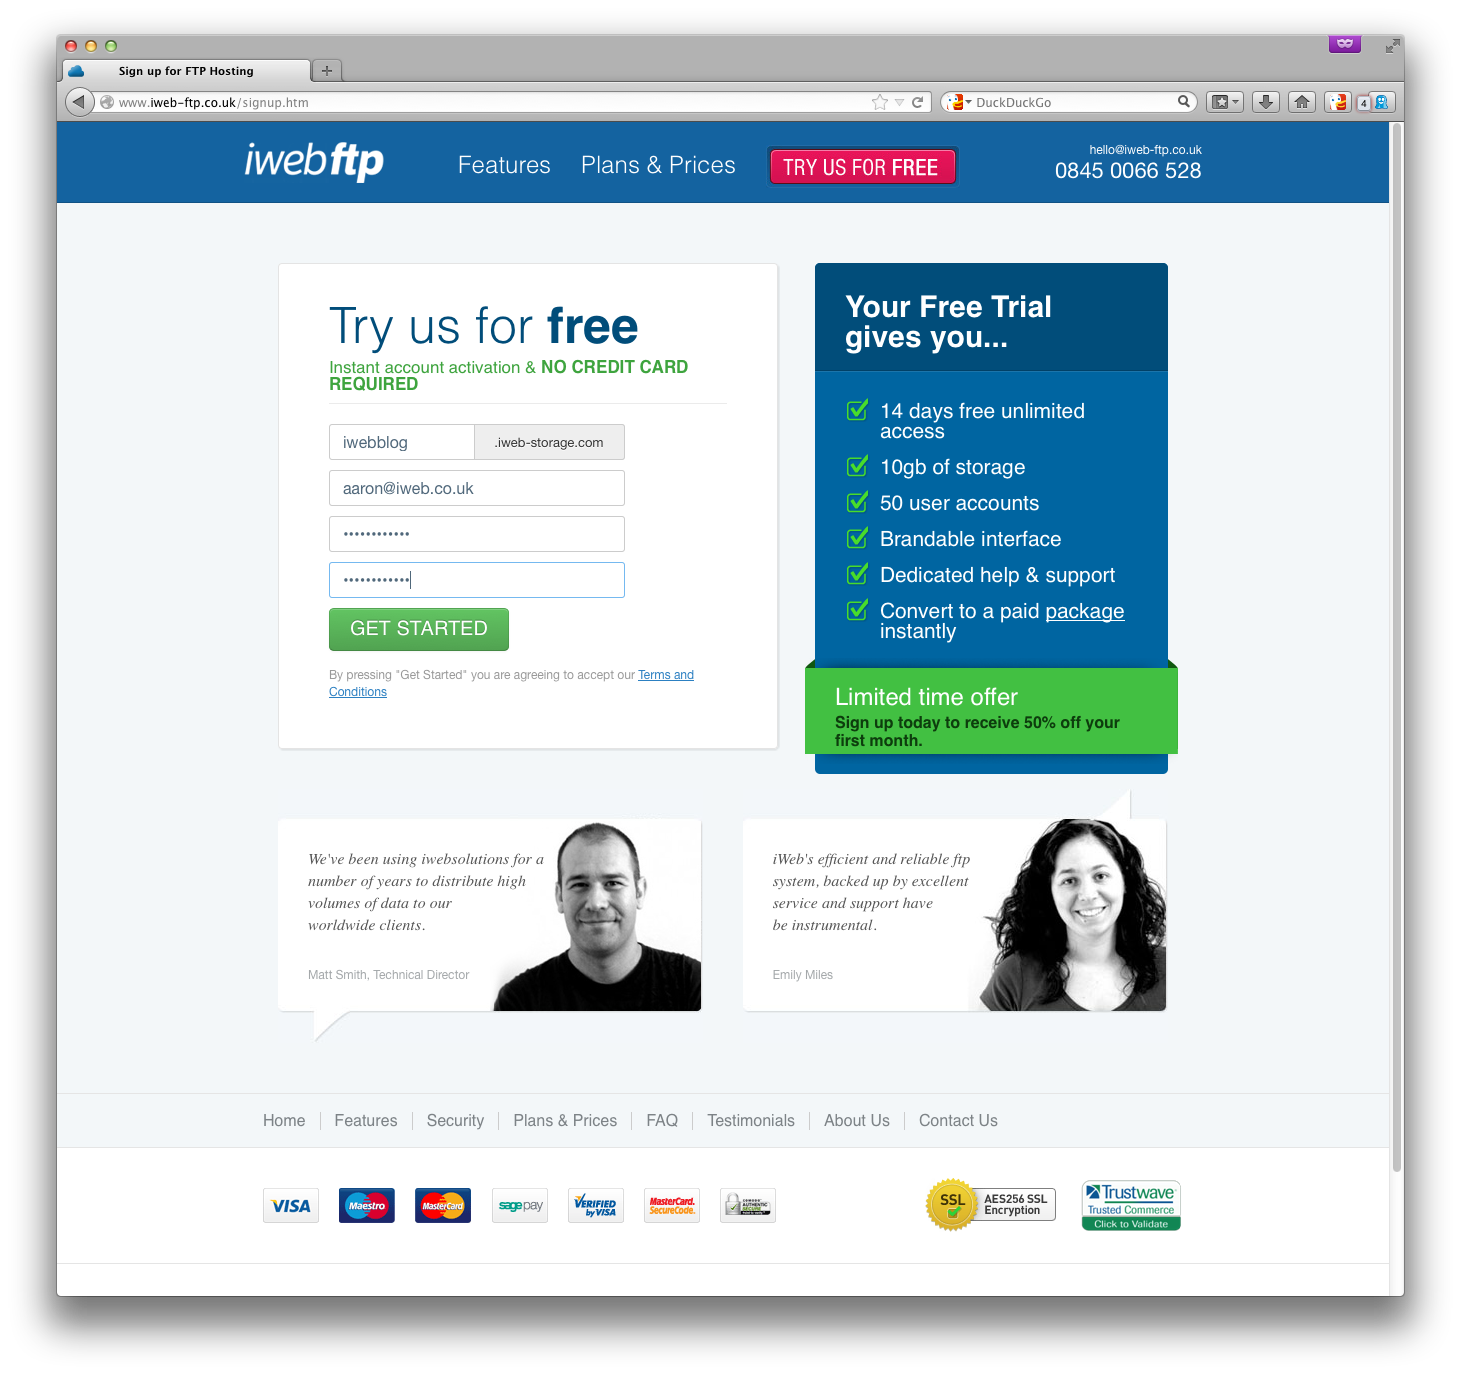
Pick your prefix

The account name field when you sign up forms part of your default URL (the
address you and others will connect to) and is also used as a prefix for any
users that you create, when they connect over FTP or SFTP.
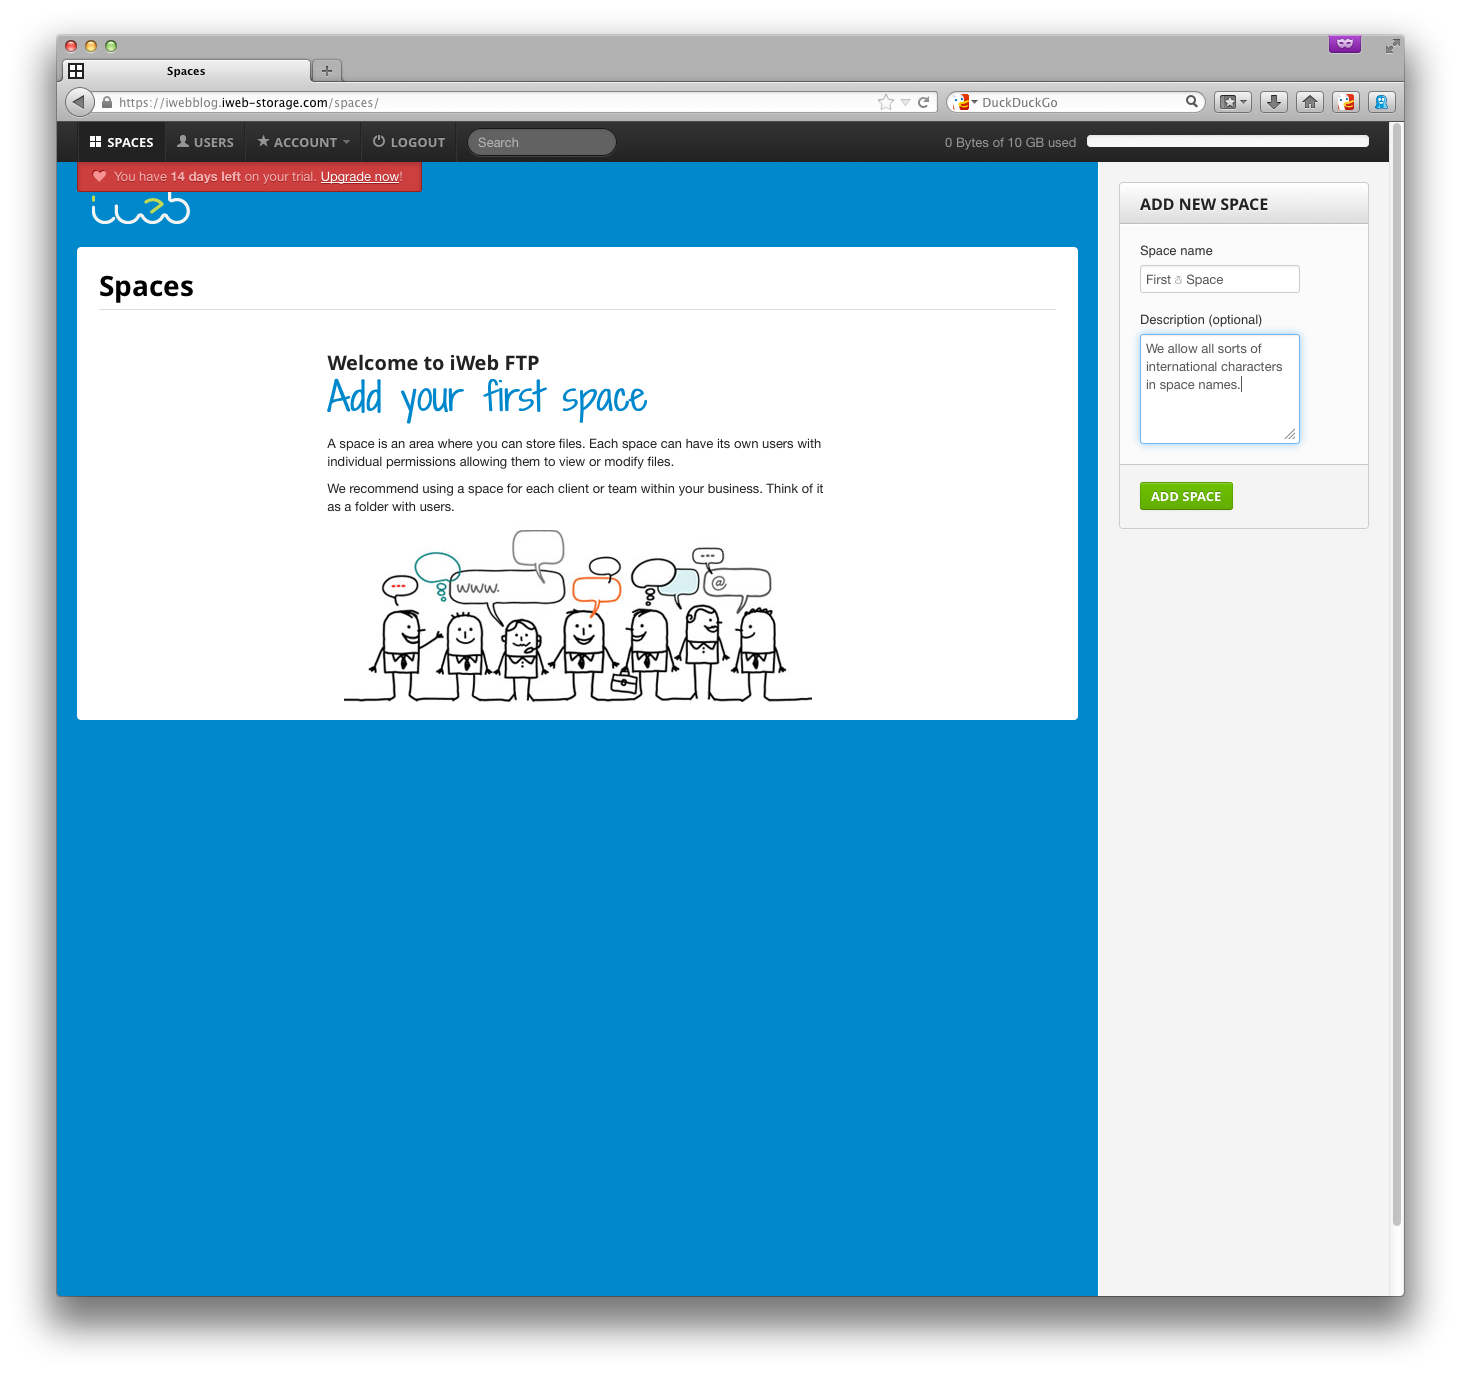
Create a Space for some files
Immediately after creating your trial you will be automatically logged in, and
presented with the welcome screen. The introductory text explains that you'll
want to create what we call a space.
Spaces are just like folders at the top level of your iWeb FTP account, and they let you group your files and folders logically and manage the who has permission to your files.
We fully support internationalisation with UTF-8 and iWeb FTP will work with files and filenames from any language, but not all client software and web browsers can handle all file names; you may want to test before putting unusual characters (like this little snowman) in space or file names.
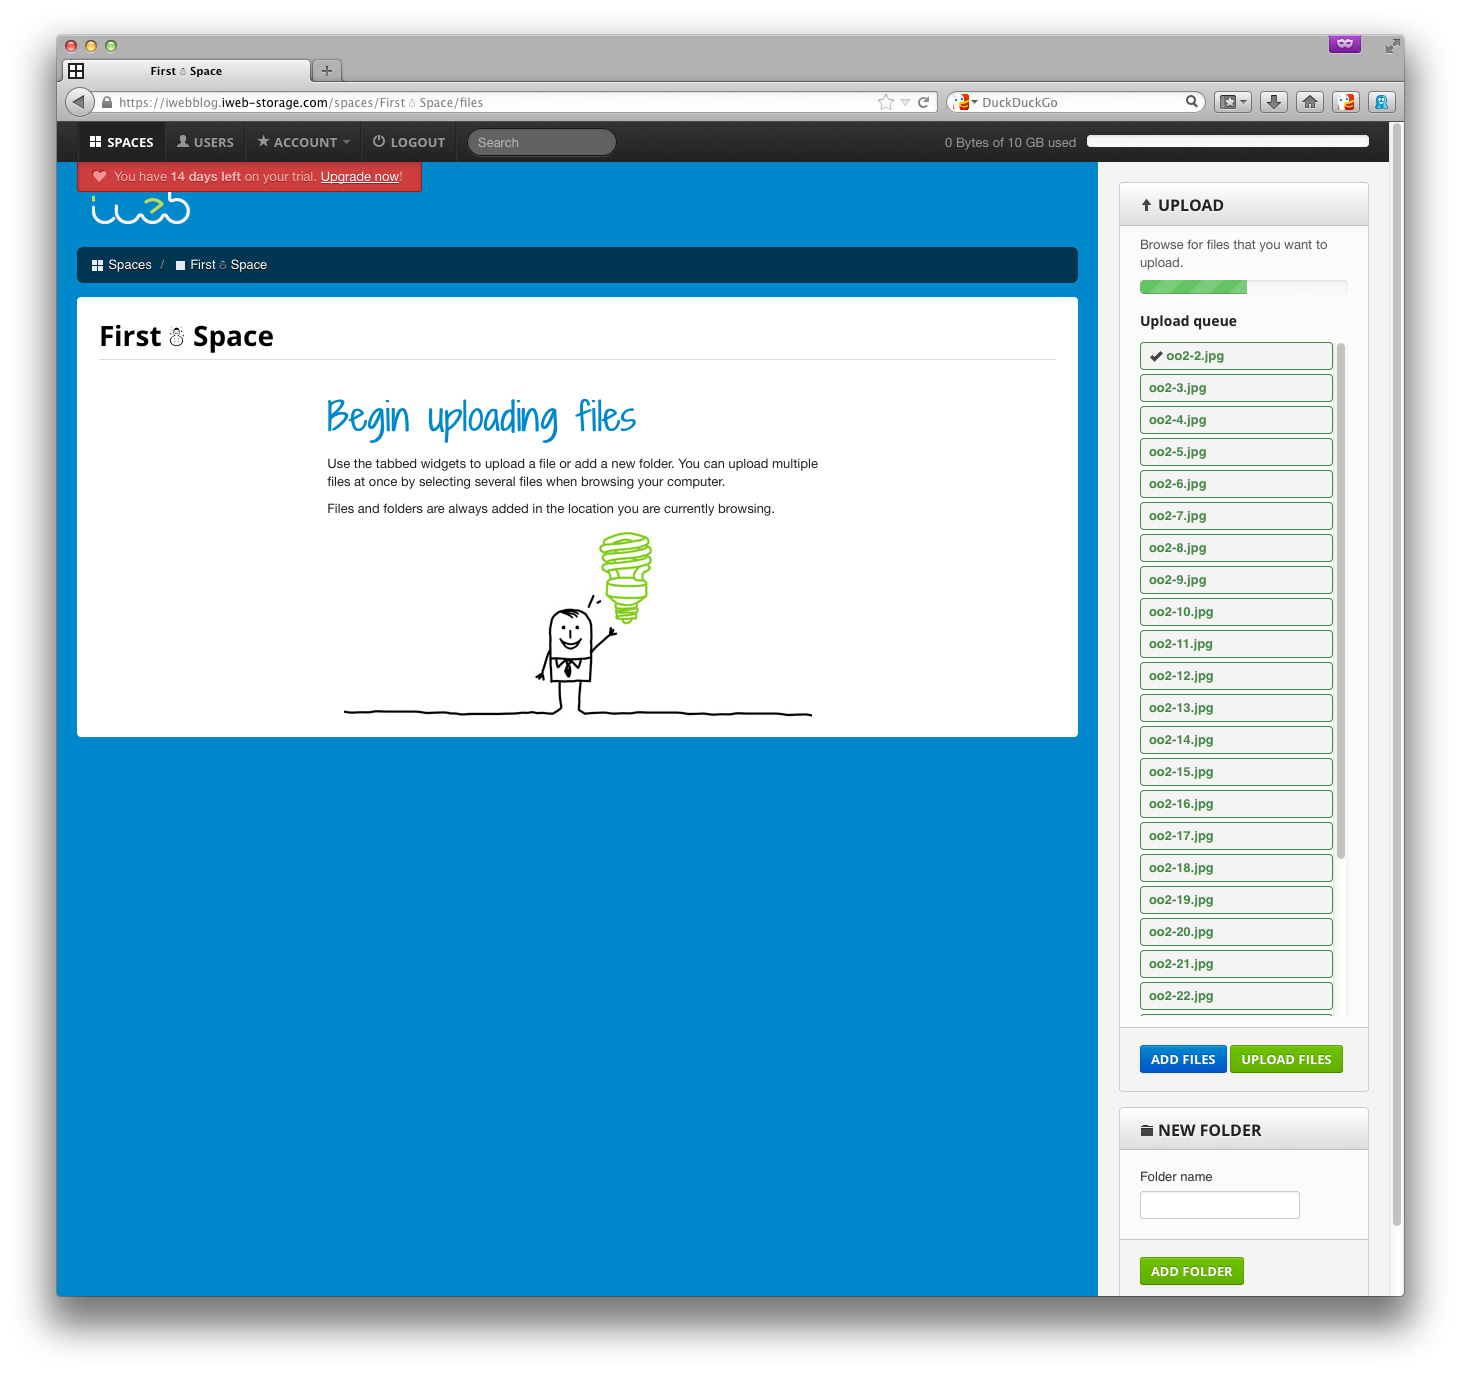
Upload them
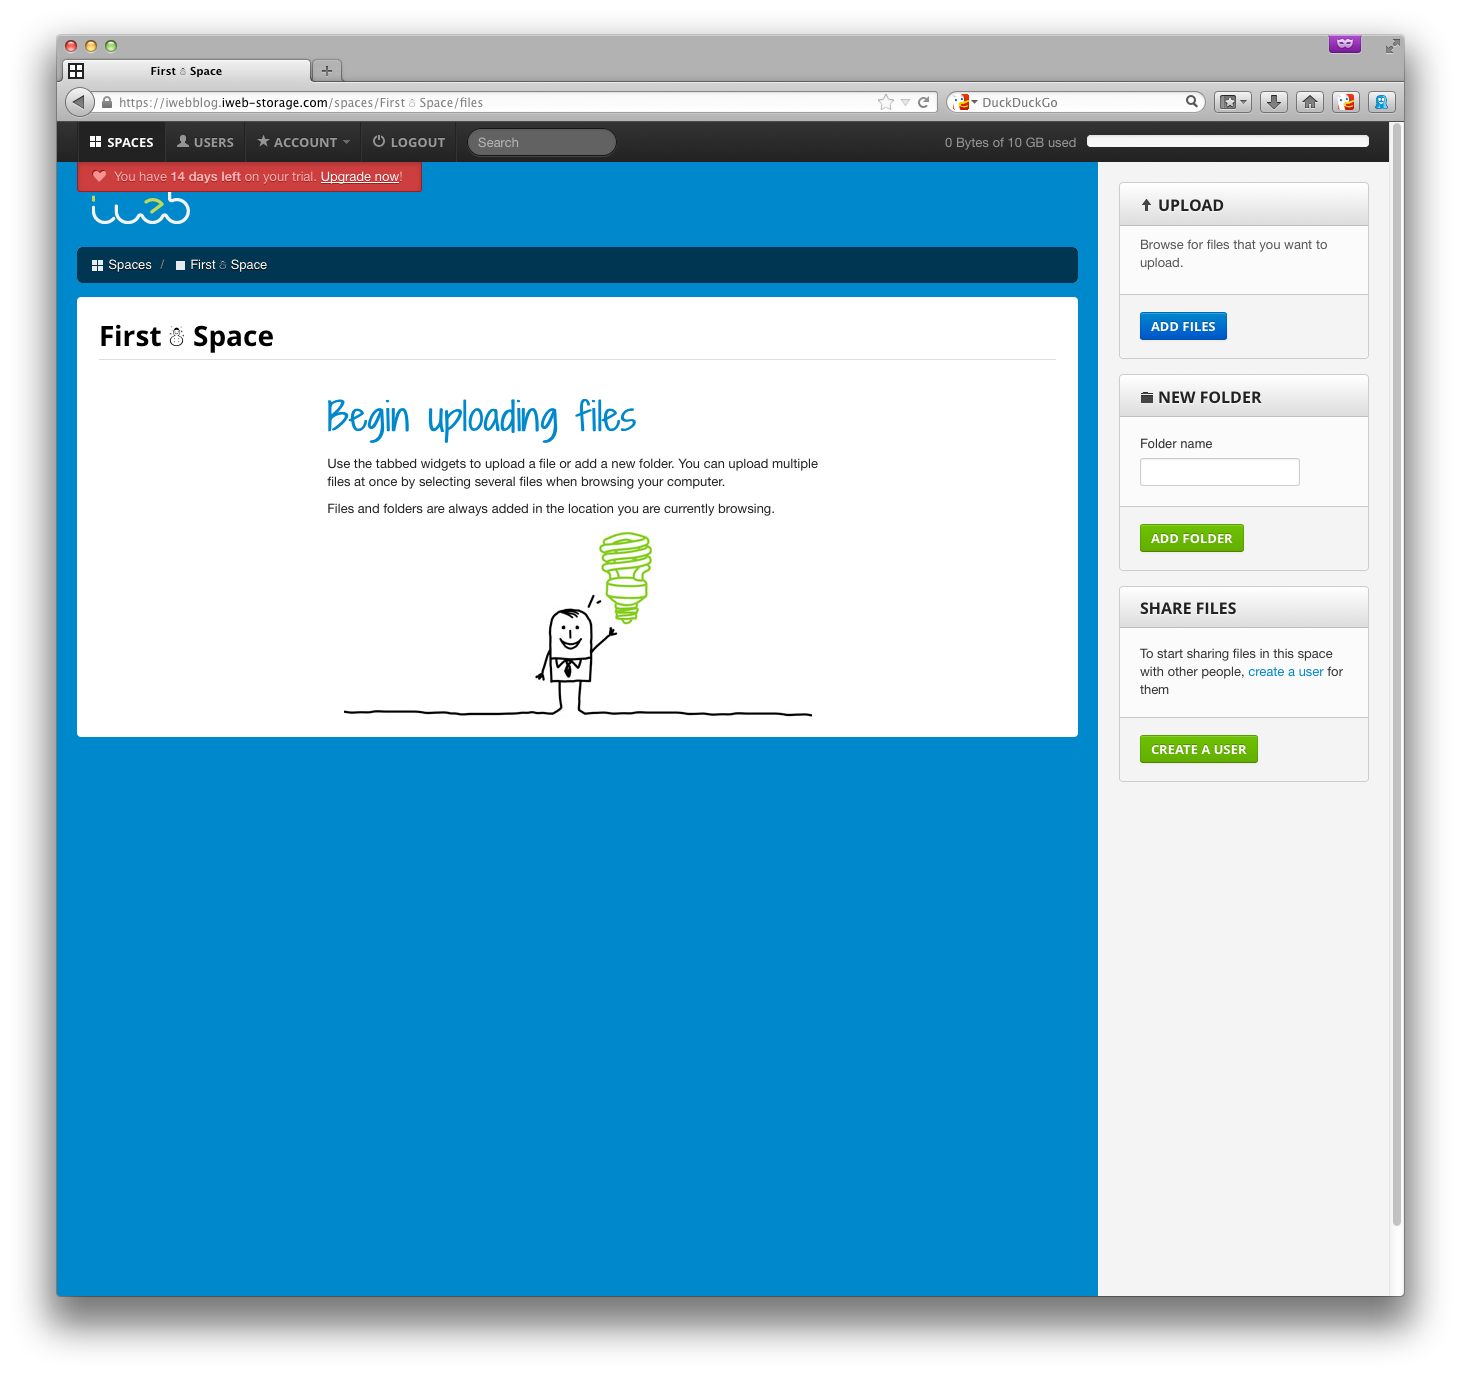
Click Add Files on the right to select some files to upload. You're not
limited to uploading one file at a time but, due to limitations present in
current web browser software, you can't upload whole folders through our web
interface. However, you can upload folders over FTP, covered later, and you
can create folders through the web and put files into them very easily.
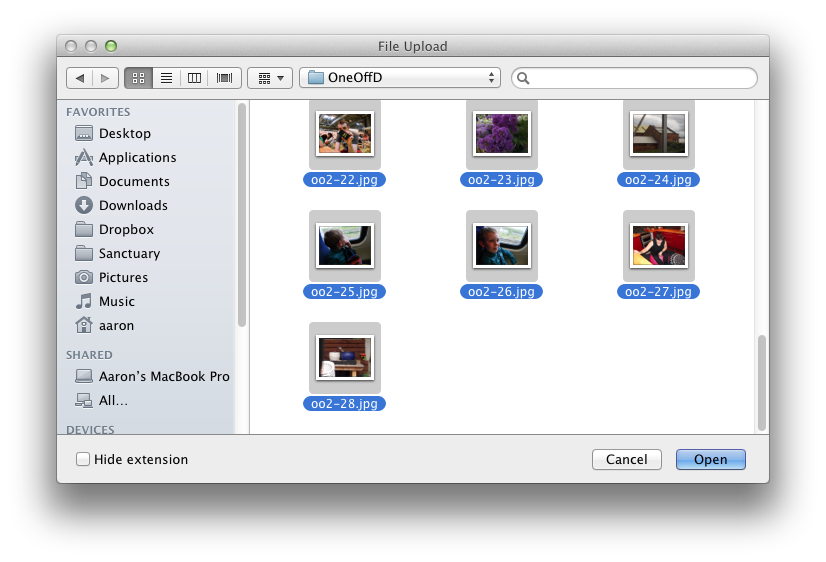
Once you've made your selection click Upload Files and you'll be able to
watch the progress of your files going up to the new space.
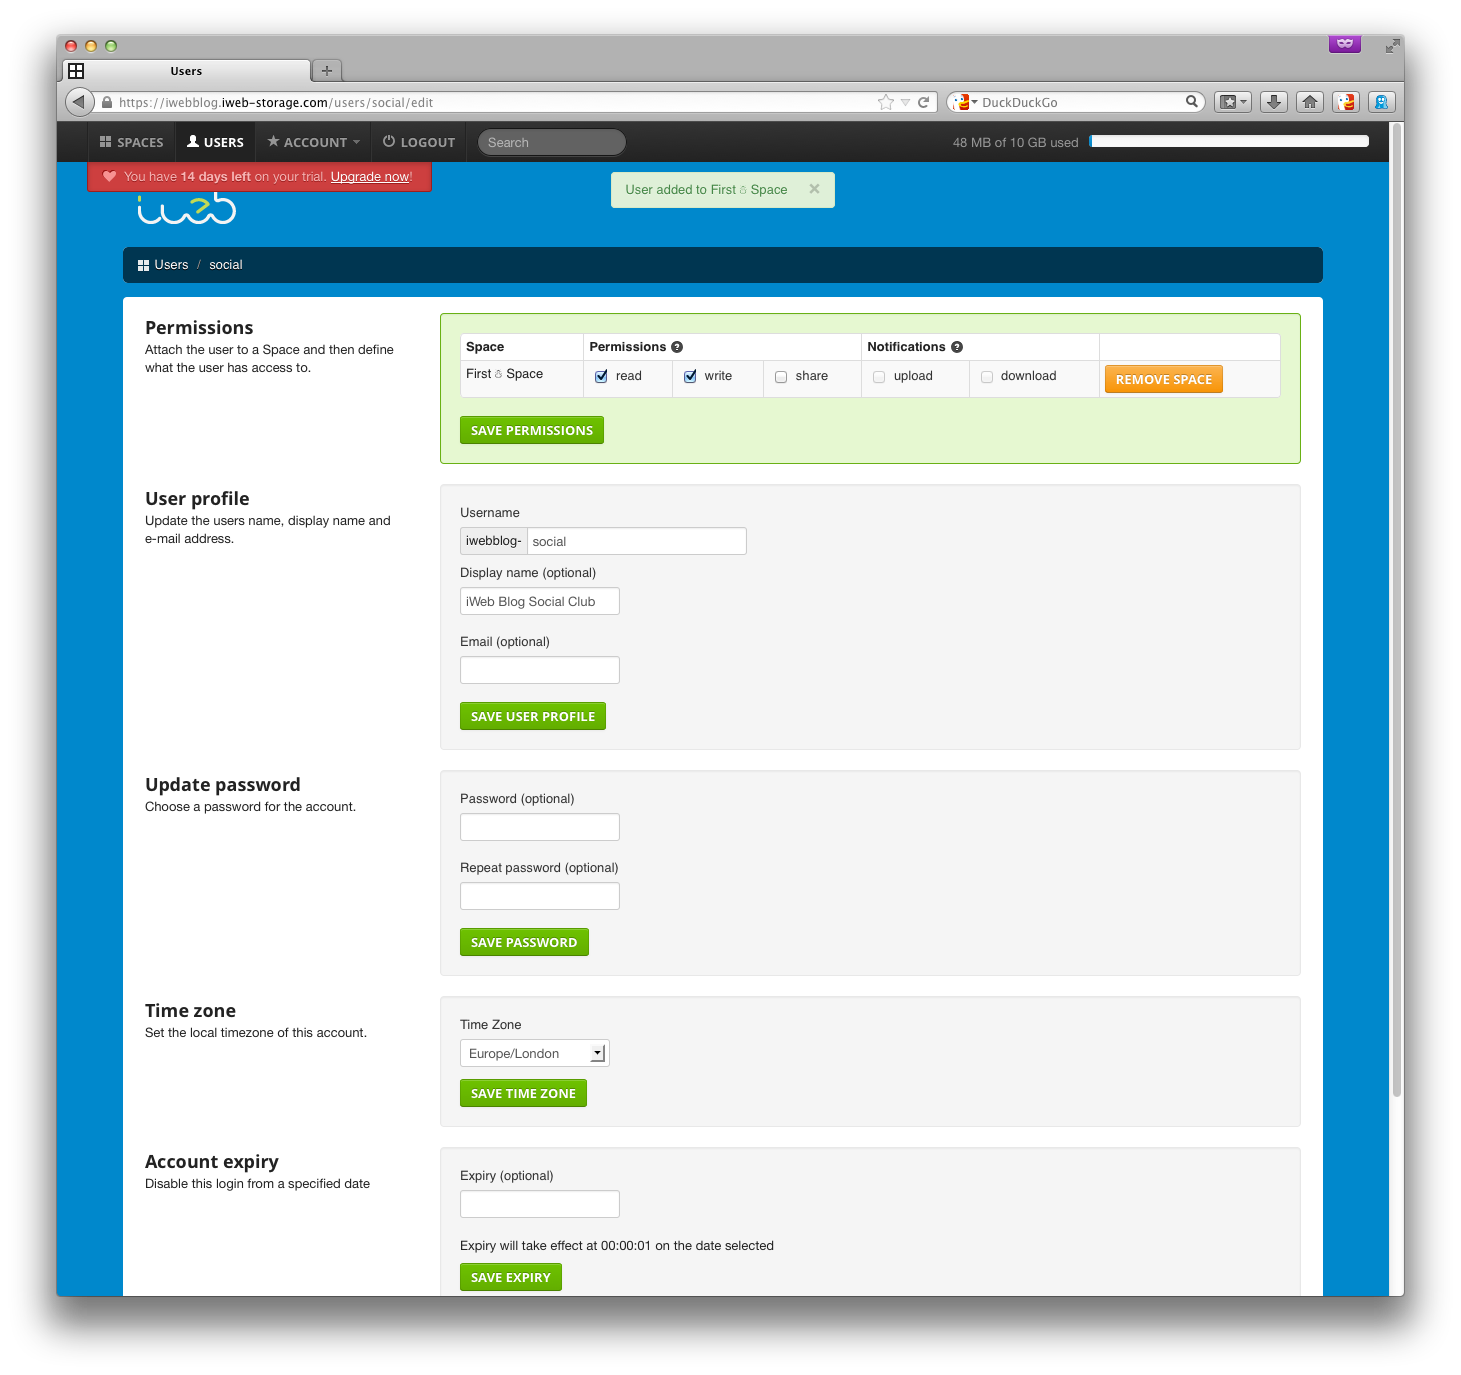
Create a user to access those files, and assign permissions
We can quickly create a user, via that button on the space page (you can also
go to the Users button in the menu at the top of the page).
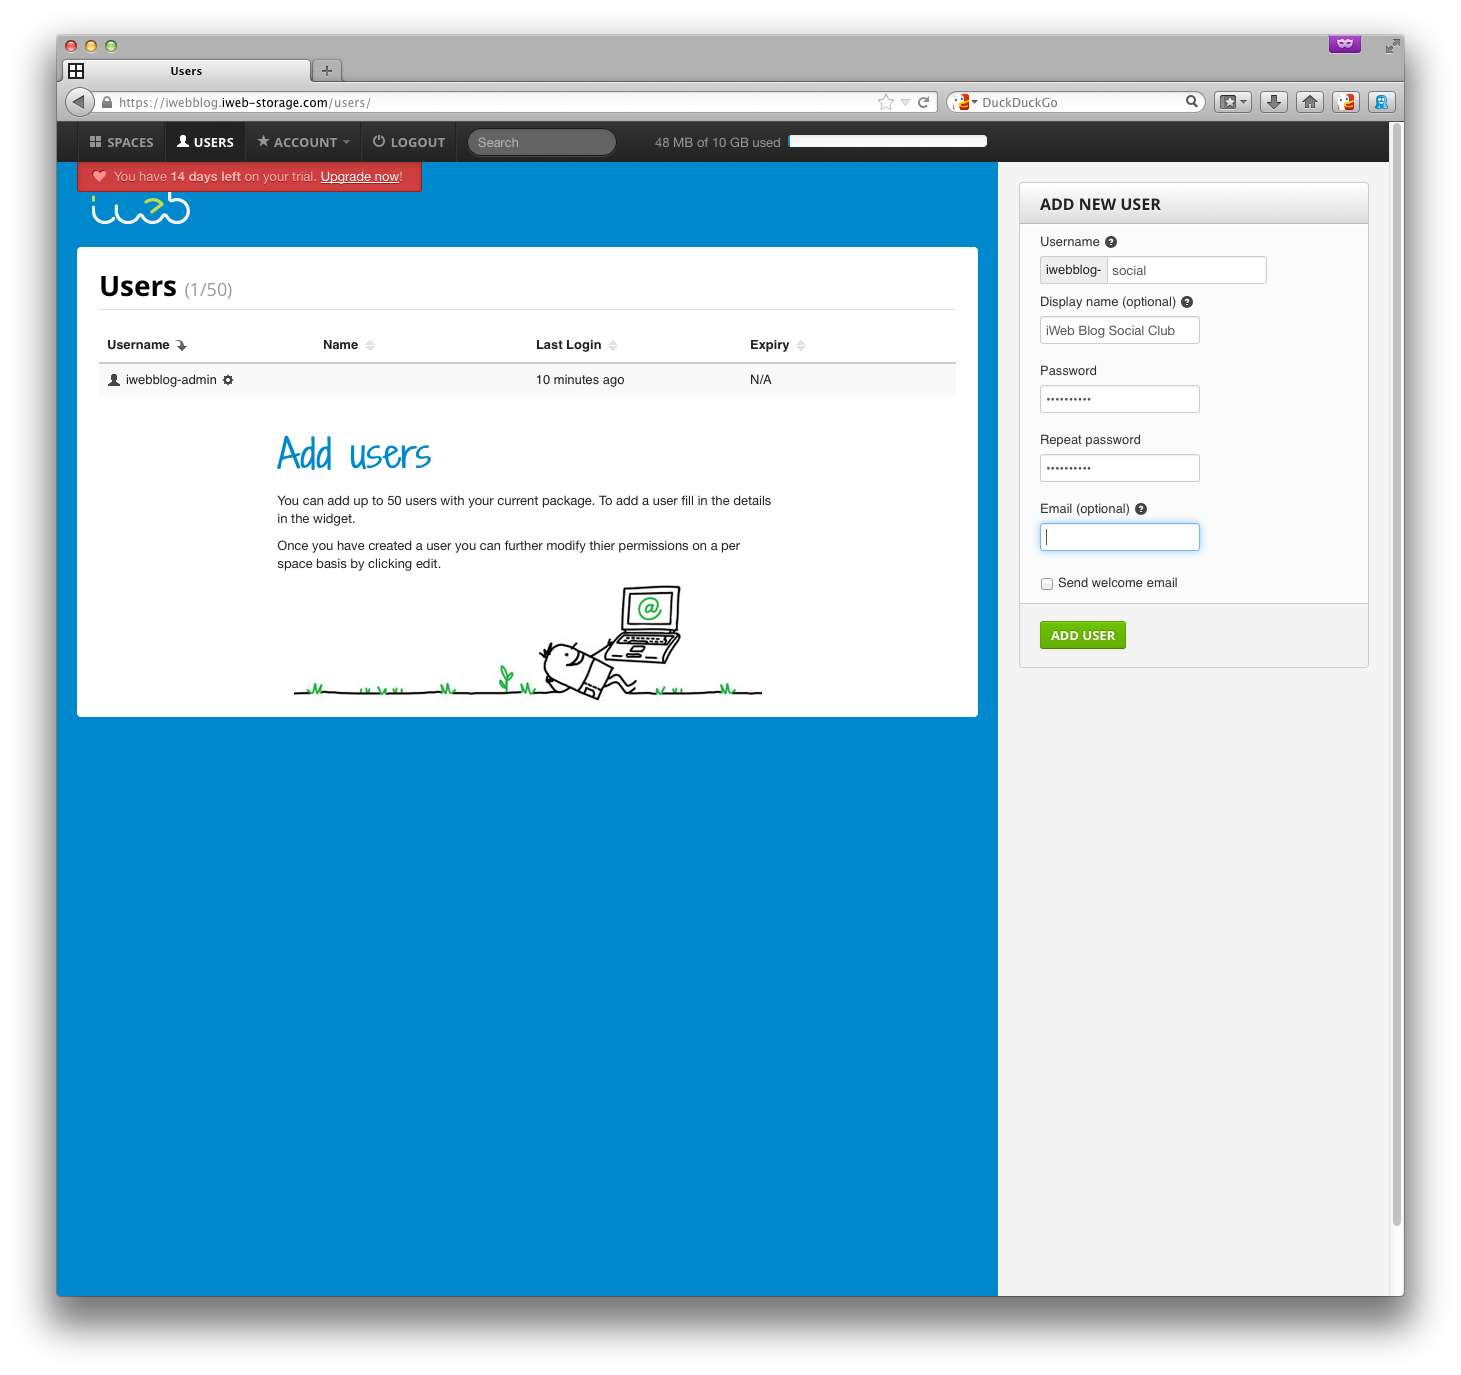
A user doesn't need to be a single person, it could be a company or a group of
people that you want to give access to a space. As these are photos from a
trip out, I'd like to create a social account and send those details out to
a few friends.
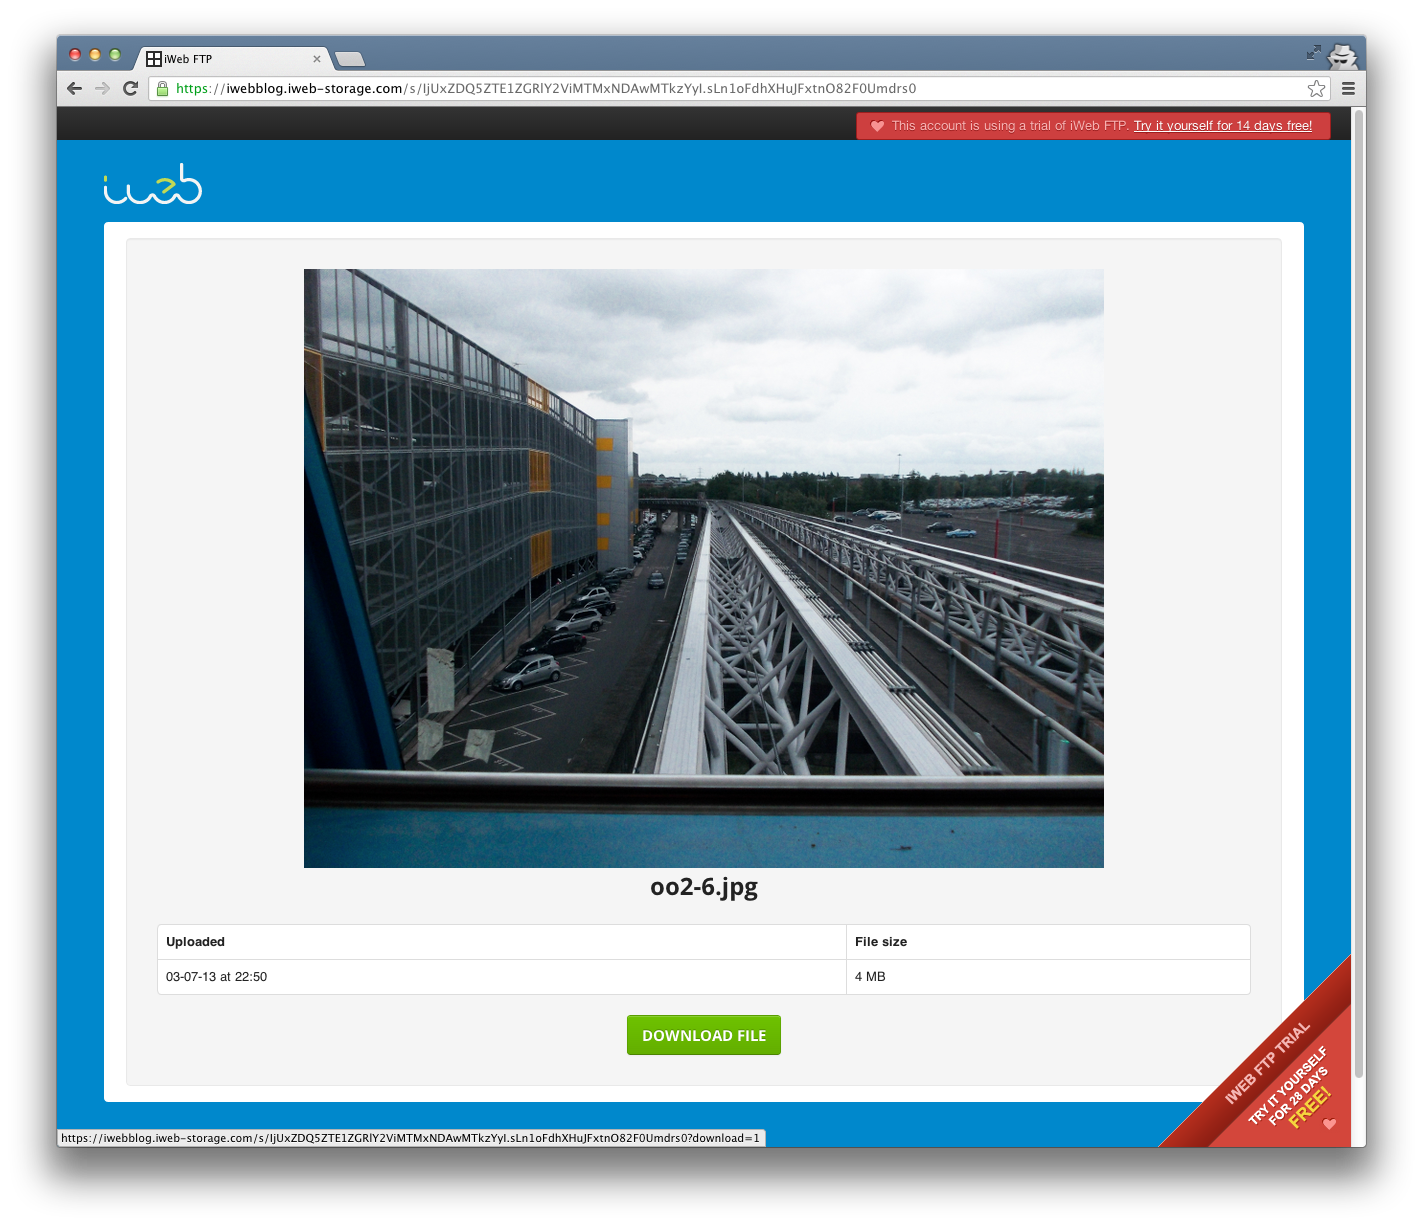
Not the only way to share files; there's Share links, too
It may seem like too much effort to create a user just to share a single file, or perhaps you're sharing with someone who you aren't going to work with again. In this case, it's possible to create a share link, a unique URL that's email friendly and that the recipient can use to download a file straight from their browser without even having to log into iWeb FTP.
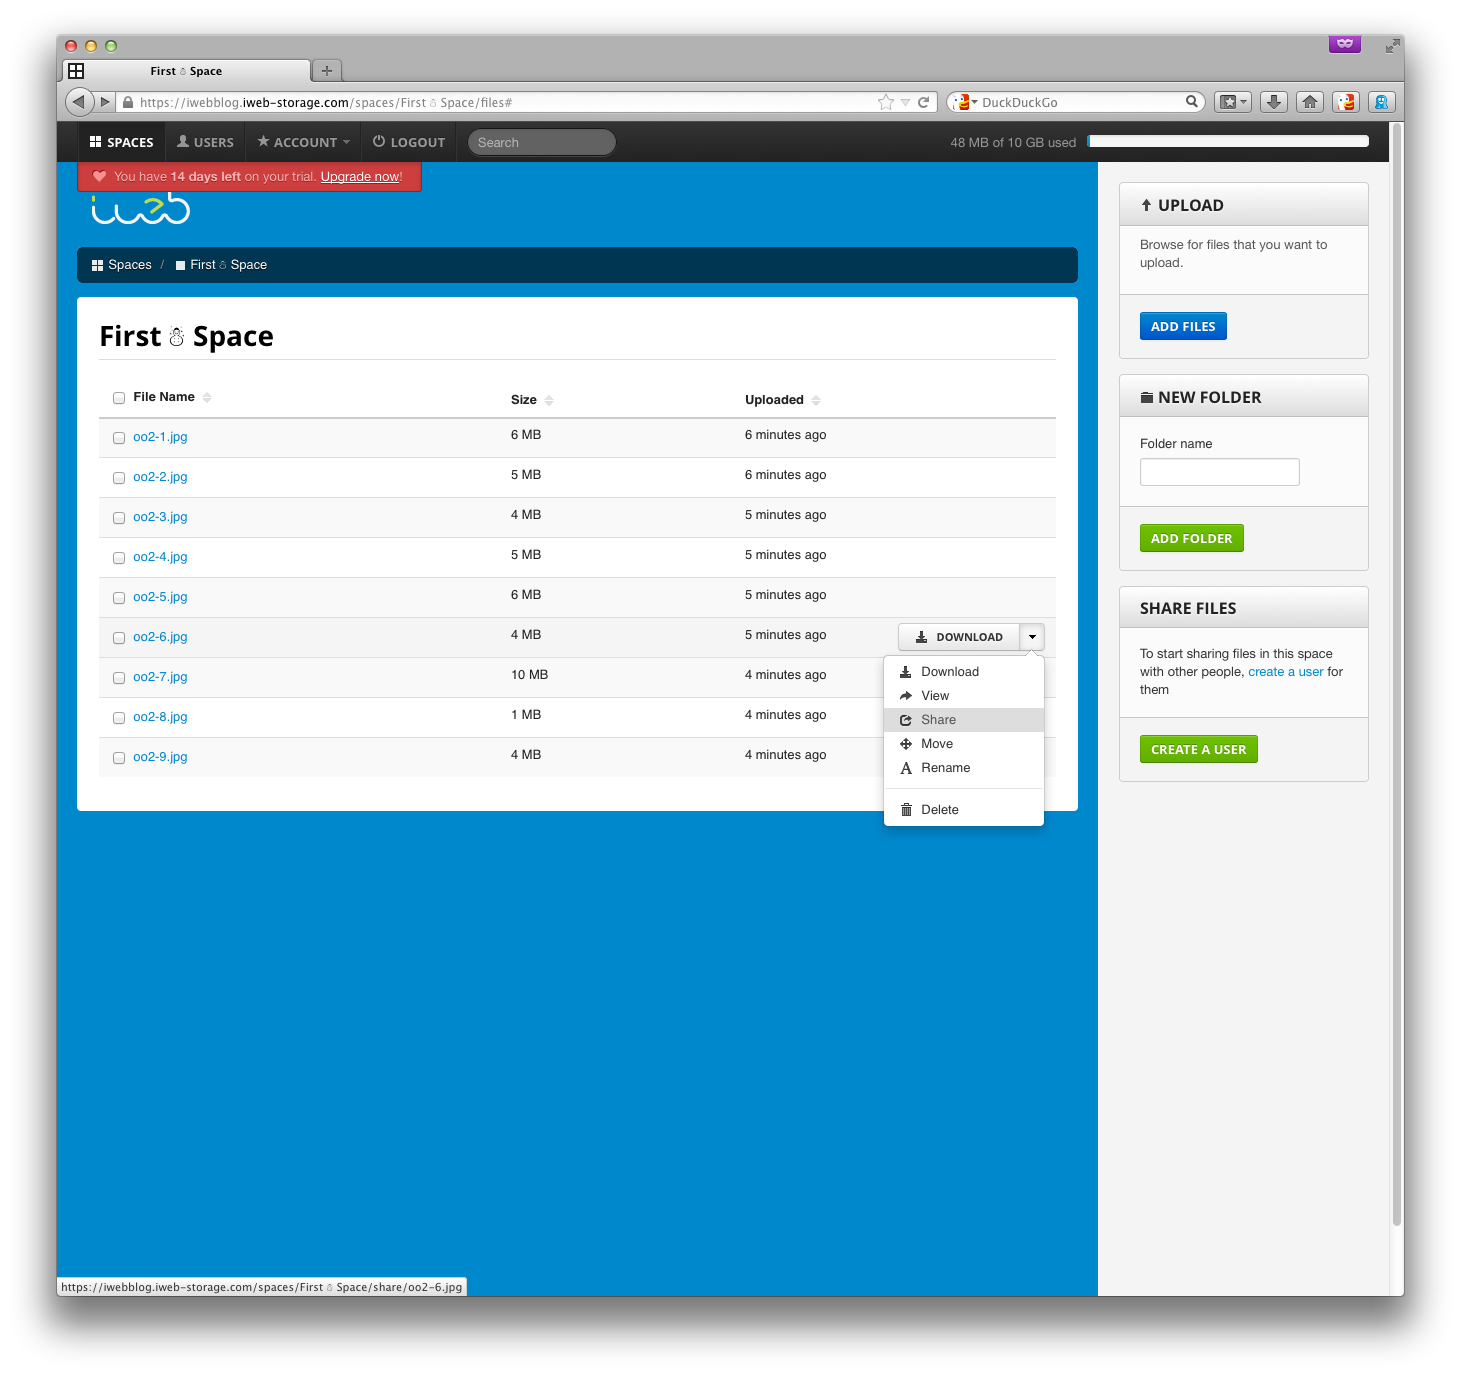
The Share option exists on every file if you're an administrator, and the
files in any spaces which you have the share permission on, for regular users.

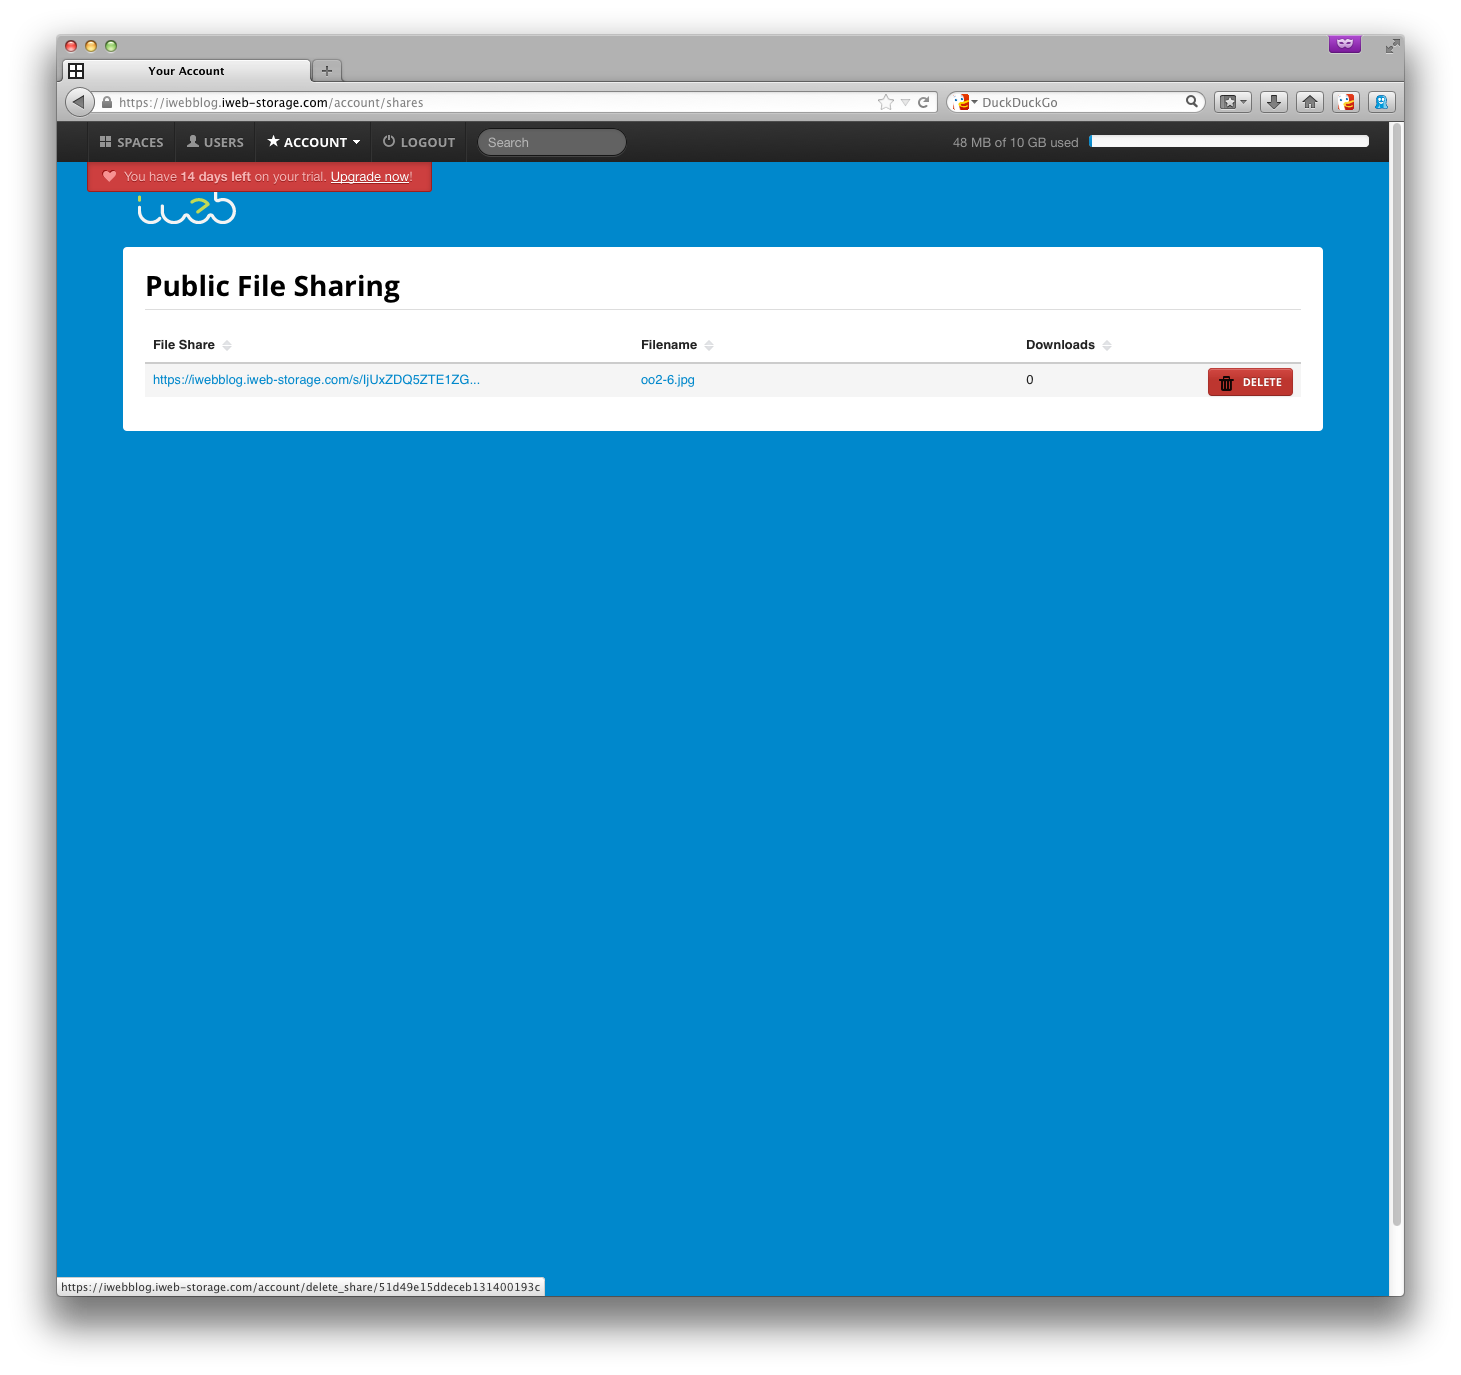
If you ever want to view your list of file shares, or revoke one after it has
been sent out, you can do that by going to the Account menu and selecting
File Shares.
Branding your account
If you're collaborating with people outside your business or simply want to make iWeb FTP feel more on-brand, you can customise the look of your account.
A custom image can be inserted onto the log in screen; this will be repeated at the top of every page for users logged in via the web, and you can change the background colour of the interface; either to match an uploaded logo, your signature colour, or just to have something different.
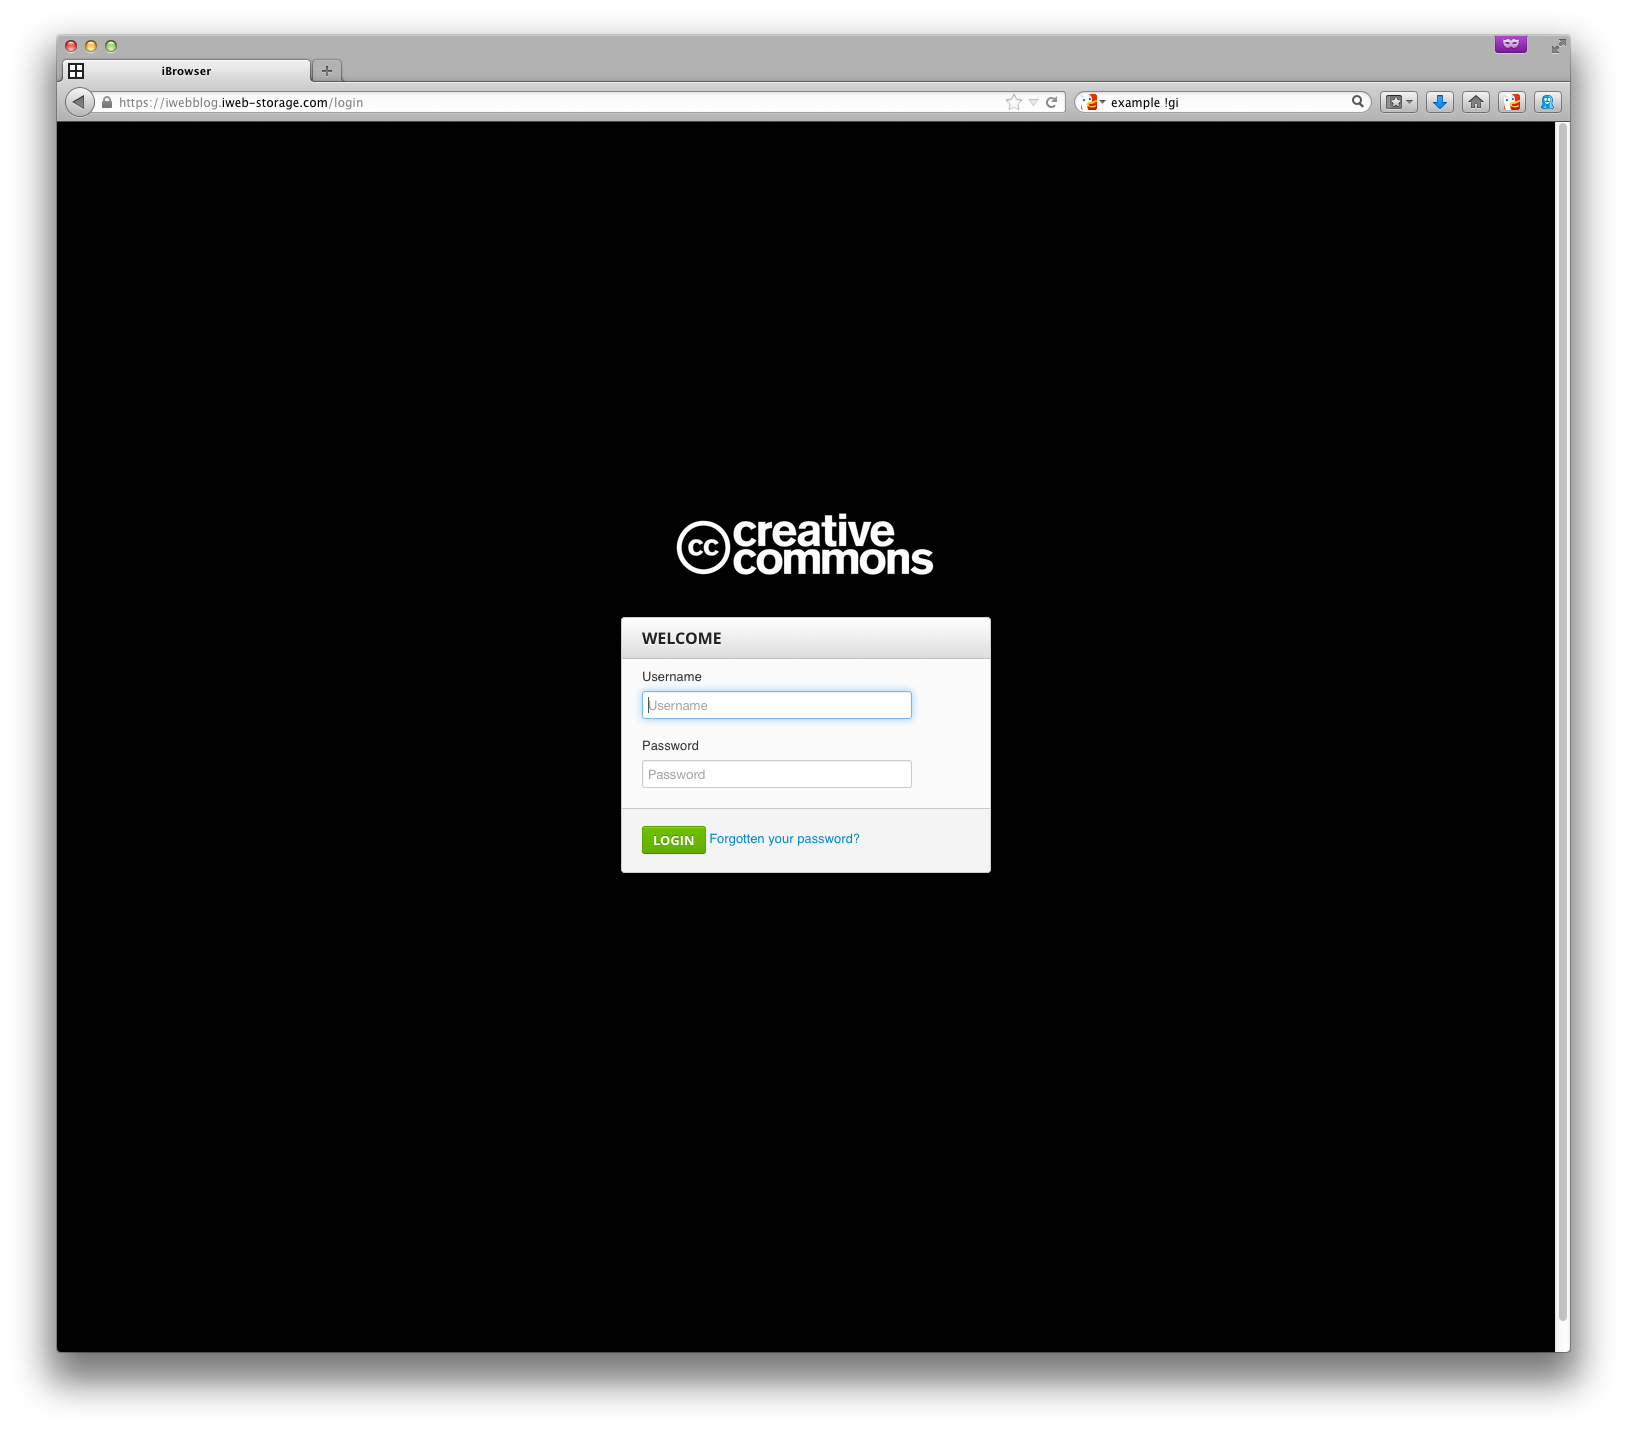
These changes carry over to share links, too!
Click on the Account menu and select Customise. You can upload an image
here (remember to click Save Logo for it to take effect).
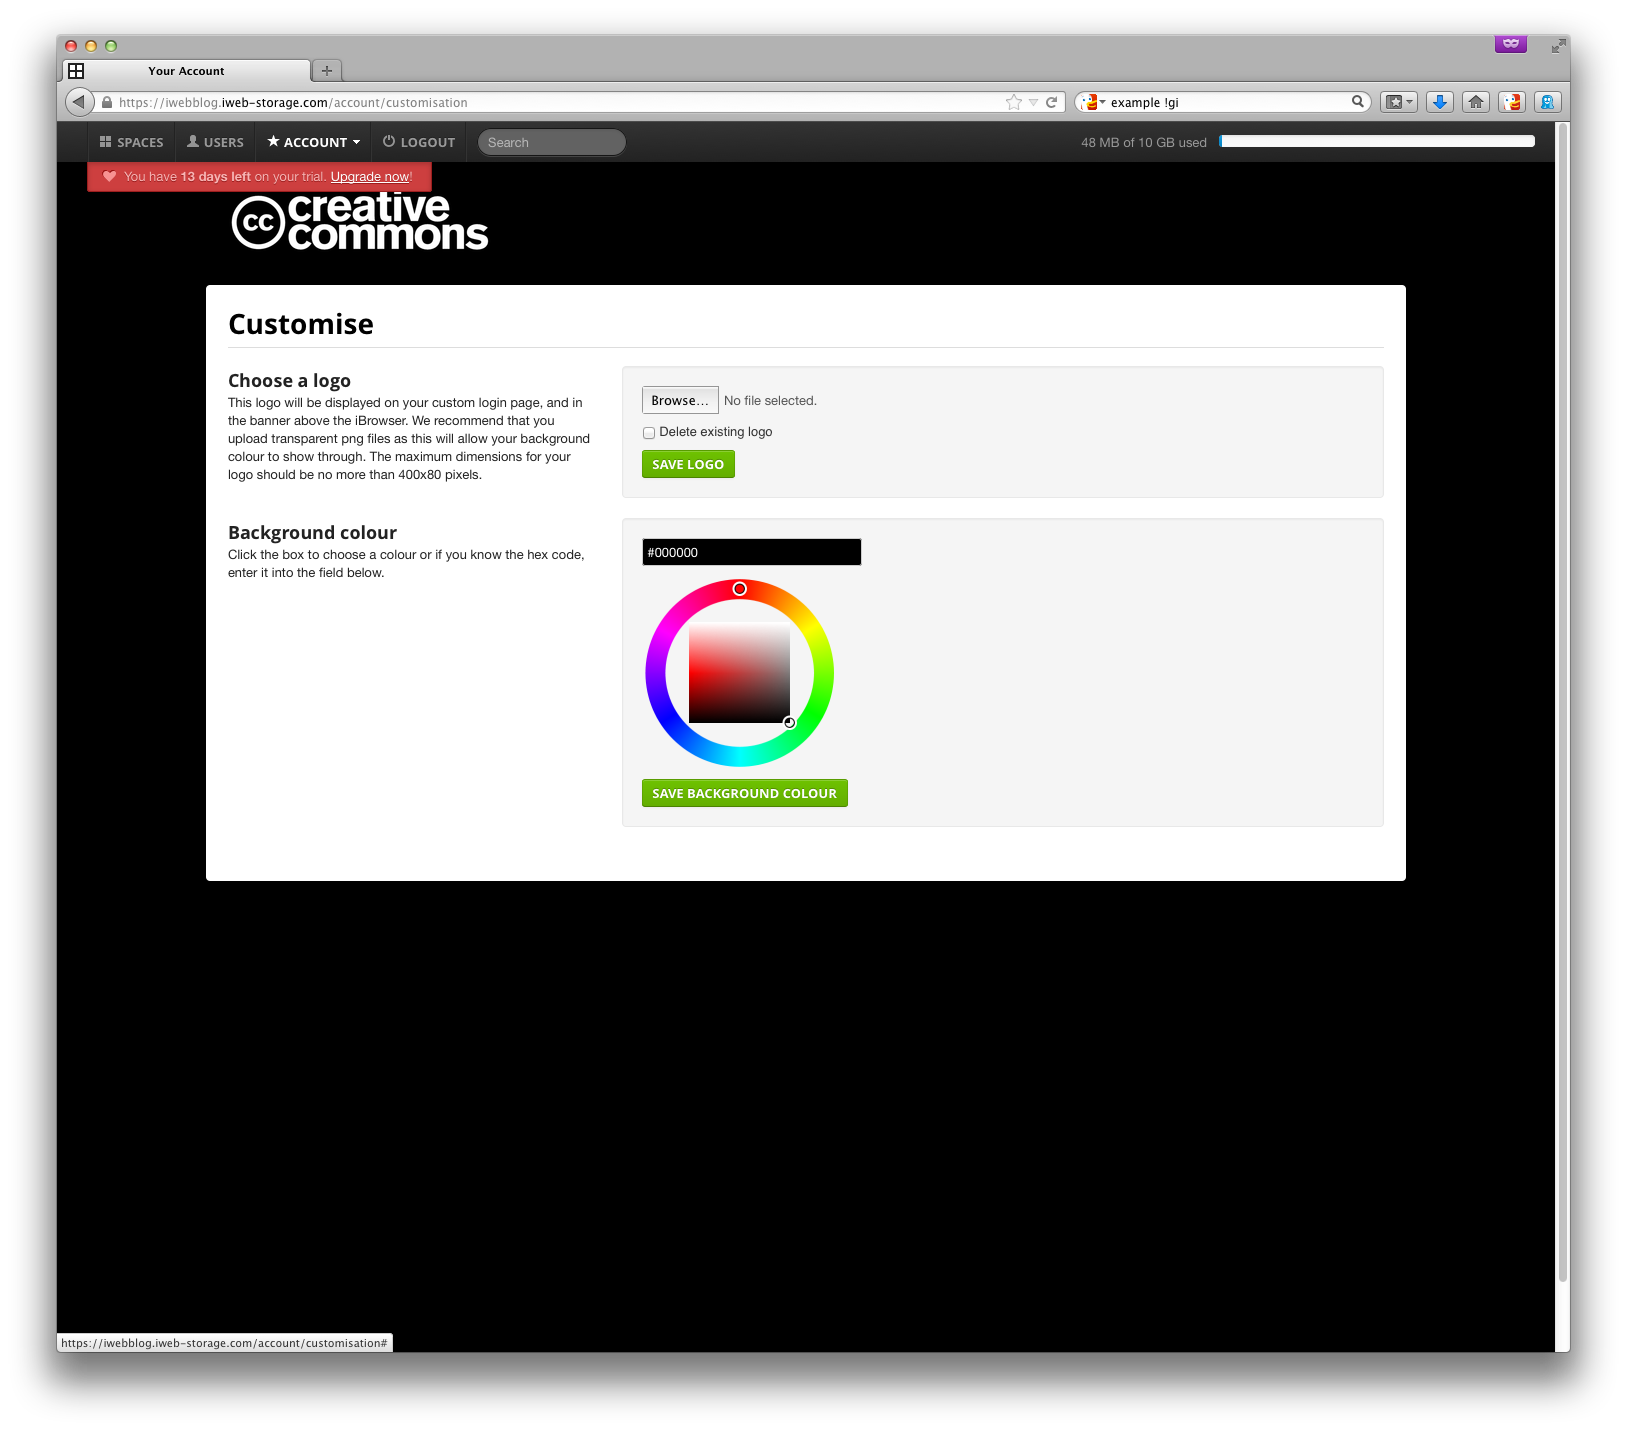
If you're having trouble matching the background of your logo using the colour picker, you can enter in a hex code - your logo designer should be able to provide this to you.
Viewing your logs
Once you have several people inside and outside of your organisation using your FTP account, you may want to keep track of what your users are doing on the FTP site.
You can view the activity log by clicking that option under the Account
menu. For each upload, download and log in event the IP address, user, and
which service was used are logged.

You can also export a version of this log which can be further processed in a spreadsheet and other tools, for reporting purposes.
You can connect using Cyberduck on Mac
Cyberduck is a FTP/SFTP client for Mac and Windows. iWeb primarily recommends it for Mac users (though other Mac clients, like Panic's Transmit are very popular). The software is free, but a donation is solicited if you find it useful, and you can choose to purchase it from the Mac App Store and fund its development.
When you first open it may not be immediately clear how to set up a new
connection: click on the plus in the bottom left of the window to add a new
Bookmark, as Cyberduck calls stored connections.
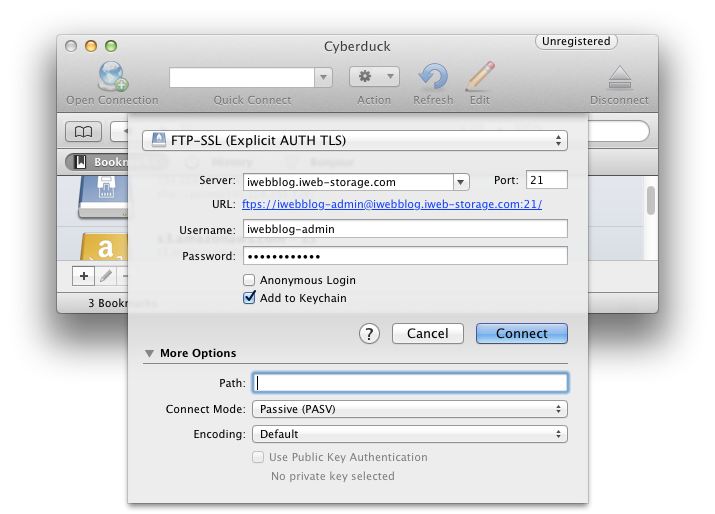
I've picked FTP-SSL (Explicit AUTH TLS) - this means the connection will be
encrypted before the username and password are sent across, and the outgoing
connection will be seen as port 21 on the firewall. Unless you have a reason
to not use encryption, this is probably the best option.
You can use your iweb-storage.com address here, and remember to prefix the
username, too. In this example, it's iwebblog.iweb-storage.com we're
connecting to, and as iwebblog-admin. Selecting Add to Keychain will mean
the password is stored and you won't be prompted for it every time that you
connect.
I've set the connect mode to Passive (PASV) - this is the most firewall
friendly way of connecting, especially when using FTP-SSL (which is
encrypted!).
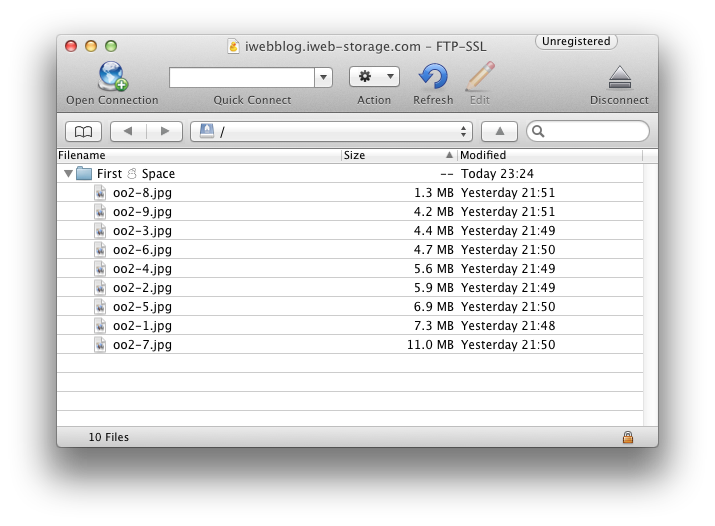
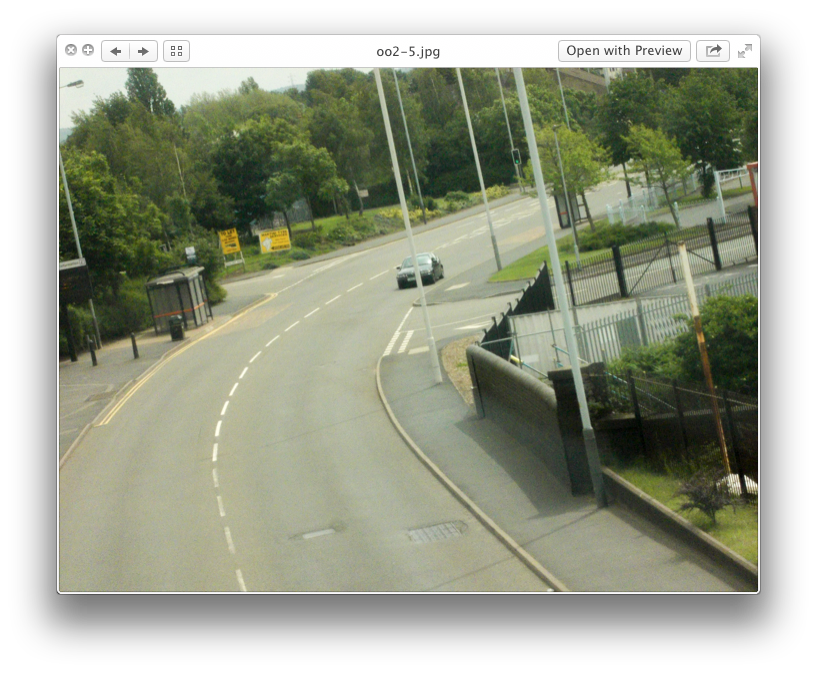
Once you're connected you can drag files to and from Finder to transfer them,
and you can even use the Quick Look feature with files that can be
previewed, like JPEGs.
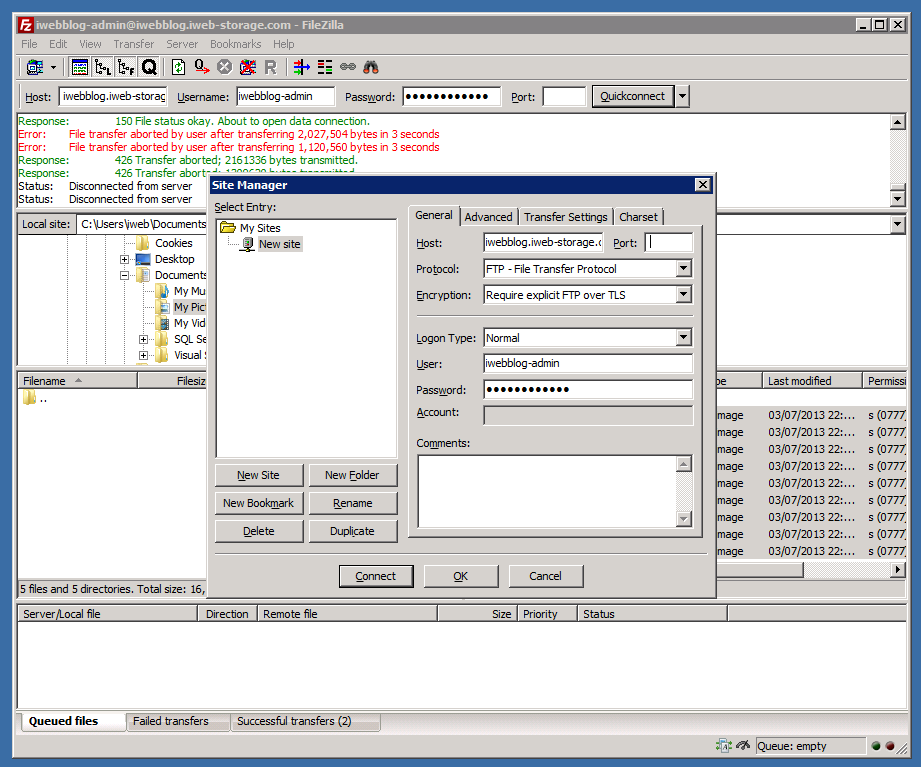
Or FileZilla on PC
FileZilla is the most popular PC client, although there are many alternatives. It's popular because it's completely free and regularly updated. It's actually also available for Mac and for Linux, but in our experience sees less use on those platforms.
You can connect to your account by putting your details into the quick connect
bar across the top; again, for this example, I'm using iwebblog-admin and
iwebblog.iweb-storage.com.

You can drag files into and out of FileZilla, just like Cyberduck, but the user interface in FileZilla is more optimised for people who use the left pane to browse their local machine, and the right pane to browse their iWeb FTP account.
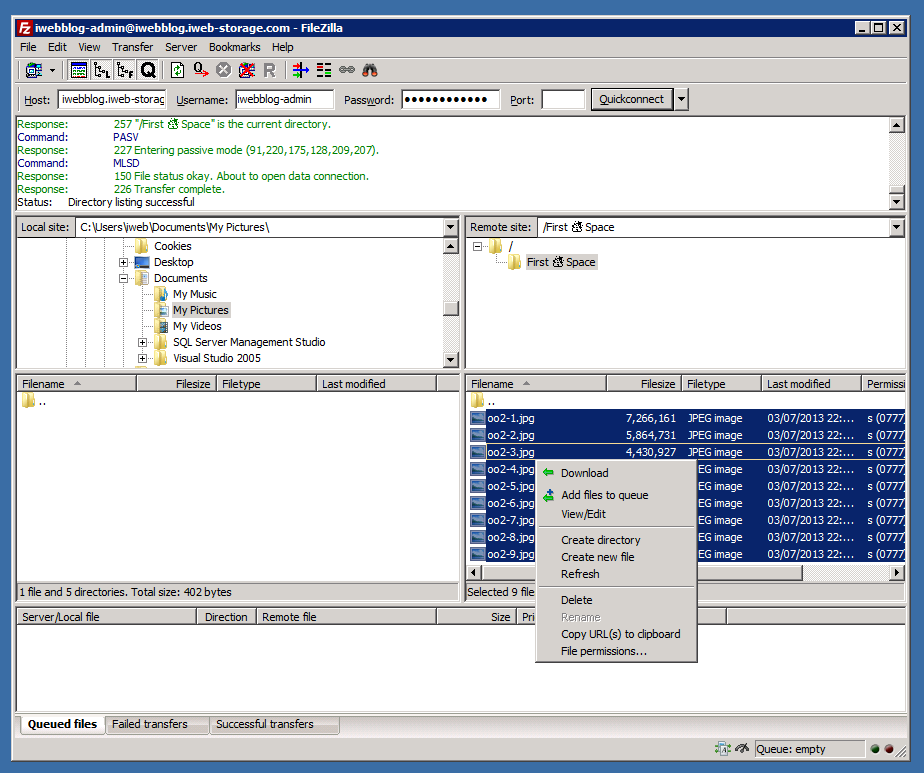
In this mode, double clicking on a file from either side will send it to the other one. That is; double clicking a remote file downloads it, and double clicking a local file uploads it.

You can see your current transfers at the bottom of the screen, and FileZilla helpfully shows you the rate your files are uploading and when they are likely to finish.
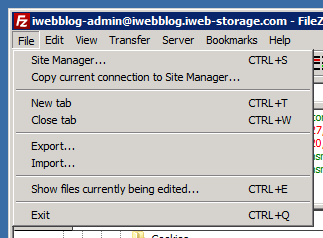
To save the site permanently, select Copy current connection to Site Manager
from the File menu.
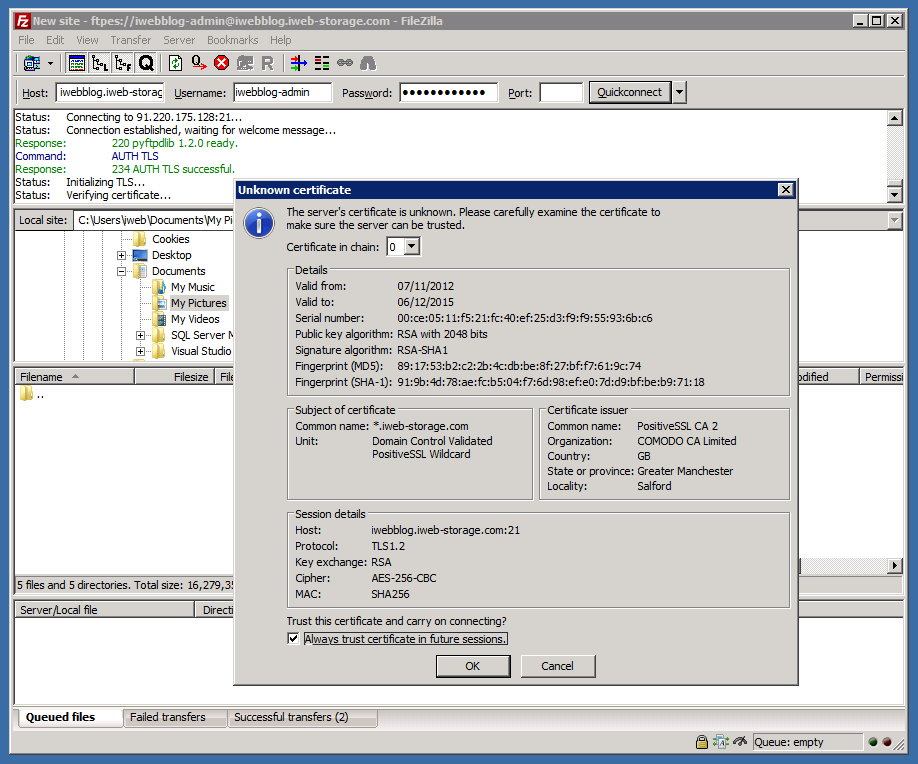
For security, you can change the connection to use explicit FTP over SSL:
The first time you connect securely, you'll be presented with our secure
certificate, and asked to verify that its secure; just check the box saying to
Always trust certificate in future sessions once you're happy.
That's it, for now
New features are regularly being added to iWeb FTP, please subscribe to our blog to keep abreast of the latest updates.
Posted by Aaron Brady
Start your FREE no
obligation 30 day trial.
No credit card required and instant activation.
Included with every trial
- 10GB of storage
- 50 user accounts
- Brandable interface
- Dedicated support